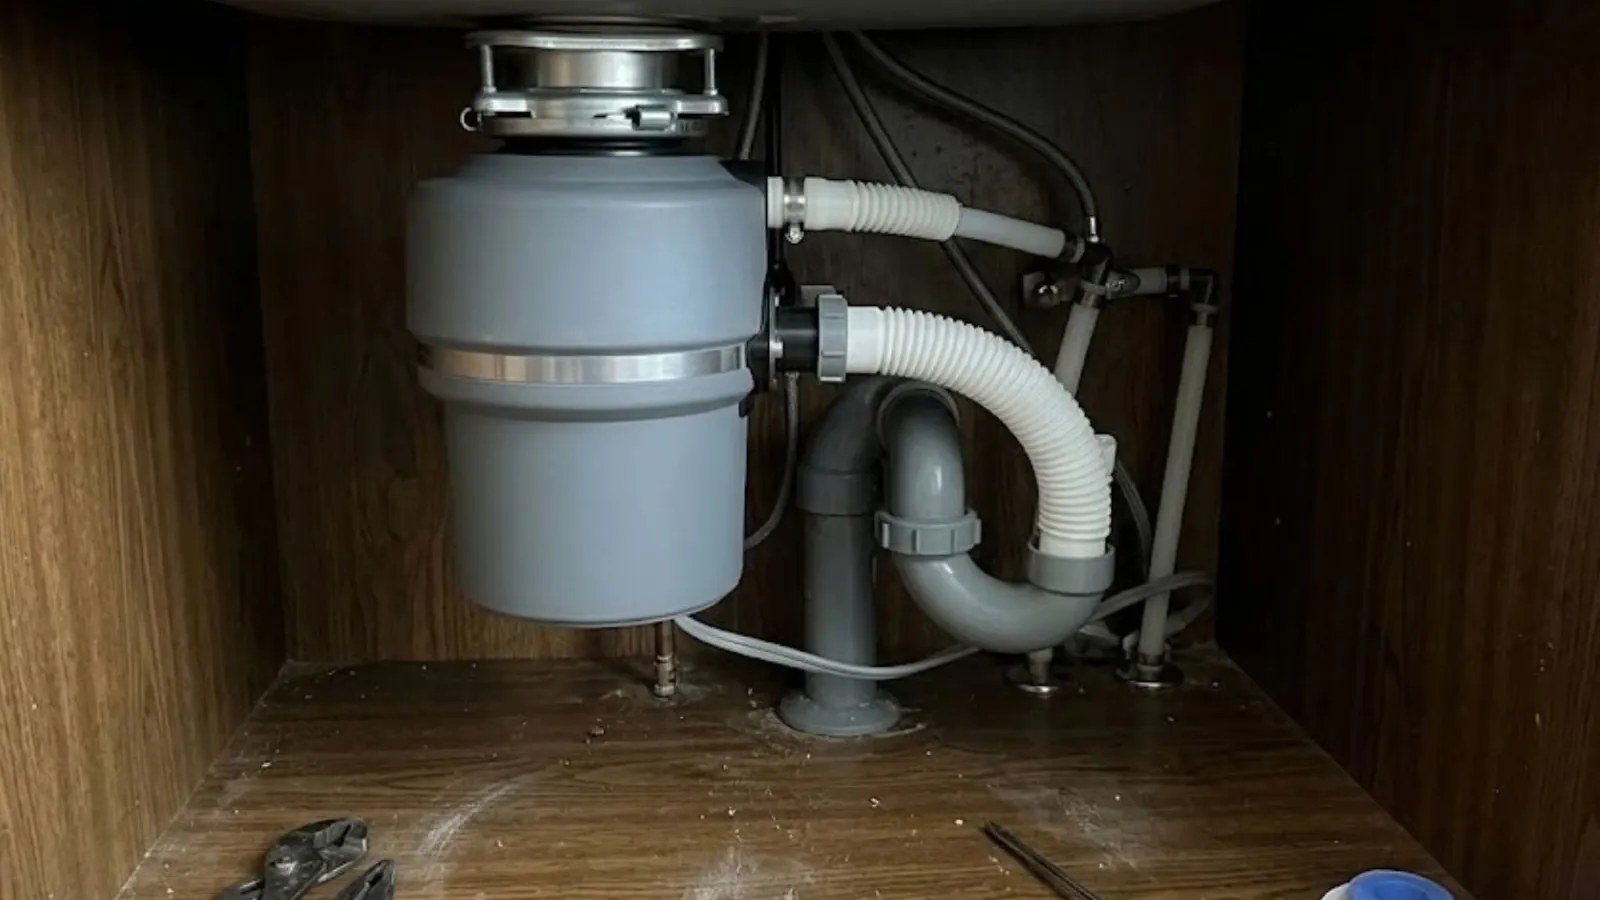
Decide whether you need a replacement
Not every disposal problem calls for a new unit. A jam that hums but does not spin can often be cleared with a hex key at the bottom of the unit. A tripped reset button on the underside can restore power.
Replace the unit if it leaks from the body, if the grinding chamber is rusted through, or if repairs have stopped holding. A leak from the sink flange or a drain pipe can be fixed without replacing the disposal at all. Our garbage disposal repair page helps you tell the difference.
Choosing the right disposal
Continuous feed
- Runs while the wall switch is on
- Lets you add scraps while it grinds
- Most common in homes
- Needs a switch you can reach safely
Batch feed
- Runs only when the stopper lid is in place
- No hands can reach the blades while it runs
- Often chosen for households with young children
- Slower to use, since you load it in batches
Beyond the feed type, look at the motor size, the grind stages, the noise rating and the mounting system. A larger motor handles tougher scraps and clogs less, but it also draws more power and takes up more room under the sink.
| Feature | Why it matters | What to look for |
|---|---|---|
| Motor horsepower | Sets how well it grinds fibrous and hard scraps | Match to household cooking habits and drain size |
| Grinding stages | More stages mean finer waste and fewer clogs | Multi-stage grinding for heavy use |
| Sound insulation | Reduces noise in open kitchens | Insulated housing |
| Housing material | Resists corrosion over time | Stainless steel grinding parts |
| Mounting system | Controls how easy the install is | Quick-lock mounts that fit the existing flange |
| Septic compatibility | Some homes have septic systems | Check before buying if you are not on public sewer |
What you need before you start
- The new disposal and its mounting kit
- Plumber's putty and a new rubber gasket set, if not included
- Screwdrivers, a hammer, pliers and an adjustable wrench
- A bucket and towels for water in the trap
- A three-prong appliance cord, if your unit does not come with one and you are wired by cord
- A new drain trap or extension pipe, if the old ones do not line up
- Safety glasses
Electrical safety comes first
Turn off power to the disposal at the circuit breaker, not only at the wall switch. Test the wires with a voltage tester before you touch them. If you are not comfortable with wiring, or the outlet is missing, ground or protection, have an electrician handle that part.
Removing the old disposal
- 1
Disconnect the drain
Place a bucket under the trap. Loosen the nuts on the discharge pipe and the trap and set the pipes aside.
- 2
Disconnect the dishwasher hose
Loosen the clamp and slide the hose off the disposal inlet. Water may drip from the hose.
- 3
Detach the wiring
With the power off, disconnect the cord from its outlet or the wires from the junction box under the unit.
- 4
Release the mount
Rotate the lower mounting ring to release the unit, holding it from below. It is heavy, so ask for help or support it with a stool.
- 5
Remove the old flange
Take out the snap ring and lift the sink flange out from above. Scrape off old putty.
Wiring or drain connections look unfamiliar?
A plumber can swap the disposal and reconnect the drain and dishwasher line so it works correctly the first time.
Mounting the new unit
Roll a rope of plumber's putty and press it around the underside of the new sink flange. Set the flange into the sink opening and press down until putty squeezes out the sides.
From below, slide the fiber gasket, the backup ring and the mounting ring onto the flange, and snap the retaining ring into its groove. Tighten the mounting screws evenly, a little at a time, until the flange is snug. Wipe away excess putty.
If the new unit has a dishwasher inlet with a plug, knock it out now with a hammer and screwdriver, then remove the plug from the inside. Skipping this is a common error that makes the dishwasher back up. Lift the disposal onto the mounting ring and twist until it locks.
Connecting the drain and the dishwasher
Fit the discharge tube to the disposal outlet with its gasket and flange. Align it to the trap so the pipe slopes down toward the wall. You may need to trim the tailpiece or add an extension to make the trap fit.
Reconnect the dishwasher hose to the inlet with its clamp. The hose should rise into a high loop under the counter before it reaches the disposal, which helps prevent dirty water from flowing back into the dishwasher.
New Jersey's plumbing subcode, N.J.A.C. 5:23-3.15, adopts the 2021 National Standard Plumbing Code. If your swap means rearranging the trap or drain, that is plumbing work held to that standard, and a licensed plumber should handle it. A straight swap onto the existing trap is a simpler job.
Where Ridgewood's kitchen waste goes
The Village of Ridgewood runs its own Water Pollution Control Facility, operated by village employees, which treats the wastewater from homes connected to the sanitary sewer. A press release described the plant as fully operational in 2013.
Everything that goes through your disposal ends up there, so grease and fibrous scraps matter beyond your own pipes. Keep fats and oils out of the unit, and ask your plumber about any septic or private system if your property is not on the public sewer.
Source type: Press release on the Village of Ridgewood wastewater plant (2013), not a village page
Wiring and testing
If your disposal uses a plug, push the cord in and secure it to the outlet. If it is hardwired, connect the wires inside the junction cover: white to white, black to black and green or bare to the ground screw. Close the cover and restore power.
Fill the sink with a few inches of water, then release the stopper. Run the disposal with cold water and watch every connection for drips. Check again after an hour, and again the next day.
- Look under the sink at the flange, mount and each joint with a flashlight.
- Run the dishwasher through a short cycle and watch the inlet.
- Run cold water and grind a few ice cubes to clear any fine debris.
- Feel for vibration or rattling, which can mean the mount needs another turn.
- Check the electrical connection and the reset button.
Common installation mistakes
- Forgetting to remove the dishwasher knockout plug
- Overtightening the mounting screws, which can crack the flange
- Leaving the dishwasher hose without a high loop
- Using too little putty, which leaves a slow leak at the sink flange
- Running the unit dry or without cold water
- Wiring the disposal on a circuit that is overloaded or without ground protection
Using a disposal without causing clogs
Run plenty of cold water before, during and after grinding. Feed scraps in small amounts, and avoid grease, coffee grounds in large amounts, stringy vegetables, eggshell piles and starchy foods like rice and pasta.
A disposal does not turn a drain into a trash can. If you see slow drainage after installation, the branch line may be coated with old grease, and our plumbing installation team can check the layout. We also serve homes in Wyckoff and Fair Lawn.
Rather have a plumber install it?
Call and share the model you want to install. A plumber can handle the mount, drain, dishwasher line and testing.
Garbage disposal install questions
A straightforward swap often takes a couple of hours. Adding a new circuit, outlet or a modified drain takes longer.
Yes, but you may need a new outlet or switch and a drain modification, and some homes cannot take one. Call an electrician and a plumber for the new connection work.
For homes on the public sewer, it travels to the village's own Water Pollution Control Facility. That is a reason to keep grease and stringy scraps out of the unit. If your property is on a private or septic system, ask a plumber before installing a disposal.
The knockout plug on the dishwasher inlet was probably left in place. Remove it from inside the disposal and the water will flow.
Grease, oil, large amounts of coffee grounds, bones, fibrous vegetables and starchy foods. Also keep non-food items like utensils and bottle caps out of the unit.